Featured Member Project: Pip’s Floors and Archway
Every month, we feature a project created by a different Vancouver Tool Library member. This month, we’re talking to Pip about her summer projects. Read on:
We’ve been seeing a lot of Pip at The VTL recently. She’s been borrowing a wide variety of tools, and every time we ask her what she’s working on, she tells us something different. That’s because this summer, Pip took on three distinct projects to spruce up her 100-year-old home. She refinished her floors, created an inlaid floor in her kitchen, and embellished an opening between two rooms – an impressive undertaking! Moreover, while Pip has some experience working with wood, she did not have experience with any of these particular projects!
Motivated by curiosity about what lay beneath her 1970s laminate 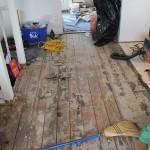
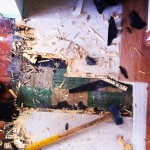 floor, Pip used a pry bar to lift the laminate, and then the 1950s checkered tiles that lay beneath that. Her hard work revealed a wide-planked fir shiplap floor. Pip scraped the residual paper and glue from the wood and removed as many nails as she could (and there were A LOT). She used a nail punch to push the most stubborn nails below the surface. Next, she moved on to addressing the shiplap joints, which according to Pip, “…are cool, but the gaps just gather dirt!” Inspired by her memories of beautiful teak sailboat decks in
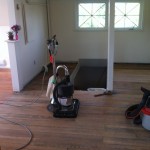
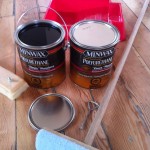 Greece, she recreated their appearance using black caulk to fill the gaps between the planks. “It’s a slightly messy and very time consuming job,” Pip warns, but she maintains, “now it’s so easy to clean and mop.” Then Pip began the sanding – the seemingly endless sanding. Because the VTL doesn’t currently have a floor sander in our inventory, Pip rented one from Home Depot (approx.$60/day), and then used a palm sander for all the hard to reach places. Finally, she applied three coats (about 8L) of Minwax floor sealer. Her floor was complete!
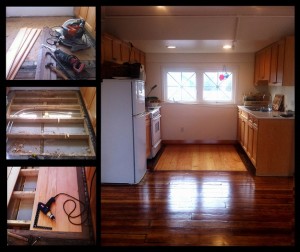 Well…almost complete. You might think she’d have called it done after that. But no. Not Pip. Because if you’ve already learned how to refinish floors, why not just go ahead and learn how to create an inlaid floor as well? Pip used a mitre saw (her favorite tool) to cut walnut planks to her desired size. Then, she used a reciprocating saw to cut out the floorboards, and blind nailed the new tongue and groove flooring in place to create an inlaid walnut floor in her kitchen. When we asked Pip how she learned the techniques she used for her flooring projects, she told us, “Internet how-tos, speaking with skilled people, the VTL for how to work the tools, books, Youtube – and a bit of trial and error.”
Pip’s final project was to embellish the opening between two rooms.  She created the posts using spruce 2x4s to add bulk, and then covered them with 1X6 baseboard material. She used a miter saw to cut baseboard detailing for the bottom of the posts, and glued and nailed it in place. Next, Pip used a router to shape the top of the post, and attached routered moulding under the post top. She screwed 1×4 baseboard stock to the wall edges, and across the ceiling, leaving appropriate space to install the corner pieces she had salvaged. Lastly, Pip applied caulk to each joint, wiping away the excess to make the joints appear seamless. Her work transformed the boring opening into an elegant heritage centerpiece. “Every time I notice some nice design,” Pip tells us, “I take a picture or save the photo. I have a big library on my computer about all types of creative stuff. From crazy-cool colours to paint the exterior of a house, to how to build window seats, to other nice details like faux exposed rafters…one of my next projects.”
When we asked Pip about the decision to take on all of this seemingly intimidating work, she told us, “Some people have said to me, ‘I wouldn’t know where to start!’ But I just quote Alice in Wonderland: ‘Start at the beginning, and when you’re finished – stop.’ It’s all about starting with a need, or getting some inspiration, and just trying to do it. Why not?”
–VTL
