Feature Member Project: Cedar Strip Canoe
Each month, the Vancouver Tool Library features a project by one of our members. Special thanks to Jenny and Mike for submitting their beautiful canoe pictures and the steps they took to complete the project!
 We bought a cedar strip canoe and, on its maiden voyage, it sunk. Our choices were clear: we could either write off this lemon of a canoe (making for some expensive firewood!) or we could make lemonade. Undeterred, we decided to refinish it and this is how we did it.
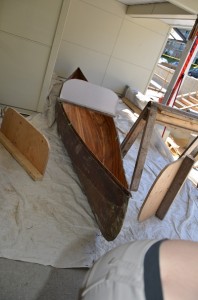
1) Make forms to support canoe structure
Tools used: jigsaw, circular saw, clamps, drills, planer, 4″ screws
Normally to refinish a canoe I would not suggest taking all the fiberglass off of it at once, but instead do the outside then the inside. Because of our particular canoe, we had to remove all the fibreglass which meant making forms to support the structure.
2) Take off the gunnels, yoke and thwarts
Tools used: clamps, Robertson #2 screw driver, vice grip, wrench, saw horses
Our canoe’s gunnels (the bow-shaped frame of the boat) were made so that water could drain out of the boat if it flipped over. This meant two long solid strips and many individual 2” spacer blocks. We took off the yoke (the piece enforcing the gunnel) and thwarts with the screwdriver, then the seats with wrenches. We clamped the gunnels before we took out the brass screws with the Robertson screw driver so there would be no resistance with the gunnels coming off. When we felt that the screw would not strip, we used a drill on a low setting.
3) Strip the canoe of the old fiberglass
Tools used: metal paint scraper, heat gun, respirator (with proper cartridge bought from fiberglass shop)
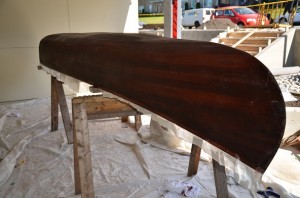
We started on the inside. Because of the toxicity, a respirator is suggested. Here is a good YouTube video on removing fiberglass. After removing the fiberglass from the inside, we flipped the canoe onto the forms to make sure the canoe stayed in proper shape. Finally, we removed the exterior fiberglass.

4) Fill the holes in the hull, re-glue strips, sand, and stain
Tools used: sand paper in varying grits, sanding blocks, planer, stapler, putty knife, glue, rags, paint brush, stain, respirator, wood paste
To fix the small holes on the side of the boat, we used a cherry-tinted wood paste fill the hole, letting it dry and sanding it between coats. As the coats dried we decided to fix the split strips. Here are two videos on it. We put the resin part of the glue on all the seams and stapled them together, then used the activator. For the fiberglass to adhere easily, we hand sanded the canoe smooth. We did not want to take a chance with a palm sander or circular sander given the thinness of the wood. Any ridges will make applying the fibreglass on the canoe extremely difficult. We then stained the outer hull with a cherry stain, which made the wood pop and hid blemishes.
5) Apply the fiberglass
Tools and materials used: fiberglass, silver tip 2 part epoxy, popsicle sticks, (many, cheap) paint brushes, plastic epoxy scraper, box of gloves, drop sheets/tarps, respirator, mixing containers, rags
First, we lay the fibreglass on the canoe. Do not fold fibreglass as it will never unfold again. We then brushed all the fibreglass so it sat smoothly on the canoe. Here is another good video, this time on applying fiberglass on a canoe. Prepare two 4″ strips long enough to cover the keel and stern ends of the canoe so that it will cover where you cut. The fibreglass experts we asked said it was best if the fibreglass is applied in one coat. So after you apply the fibreglass and trim off the excess you have to carefully apply the two 4” strips on both the keel and stern. We did three layers of epoxy. Repeat this step and the previous one on the inside of the canoe.

6) “Puddle” the keel and stern
We then finished the tips (keel and stern) with puddles of epoxy. By tipping the canoe vertical, the epoxy pooled at the bottom and we let each side sit for a day. This gives the keel and stern a little extra oomph for those times that you have to walk off the front of the canoe.
7) Reattach the gunnels, yoke, and thwarts
Tools and materials used: Palm sander, sand paper, stain/oil/varnish, screw gun, brass screws, LOTS of clamps, wood glue
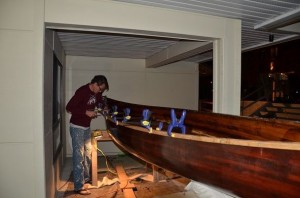
We sanded down the gunnels, yoke, and thwarts. We applied varnish to the wood, but the epoxy itself would work just as well. Reattaching the gunnels is a two-person job. Clamp one side at a time, then screw in the gunnel from the centre of the canoe outward.
8 ) Replace the forward and back tip protectors
Some canoes have paddle-like pieces that slide in and cover the keel and stern ends of the canoe on the inside. We applied fiberglass to both sides of the paddles and cut off the excess. On the sides of the tips, we left a couple of inches of fiberglass all around to the backside and applied epoxy to the fiberglass that stuck out.
9) Reattach the seats
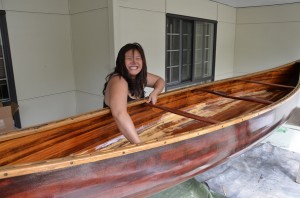
We found that it was nice to have the seats at a height at which our feet could go underneath them. Paddling on your knees instead of sitting in the seat will save your back some aggravation.
Great instructions, Jenny and Mike! The perfect project to complete before the summer is here.
