Every month, we feature a project created by a different Vancouver Tool Library member. This month, we’re talking to Tom about his homemade composite downhill skis.
What inspired you to make your own skis? During the first major snowfall of the 2005-2006 ski season, I broke my ankle. I was choked that it would mean several months of recovery and I would miss most of the ski season. I needed a project to get my mind off of the injury. At the time I had been looking for a project that involved steam-bending wood. As I started doing research, I found some online resources for making composite downhill skis. My good friend Malcolm was equally intrigued, so we decided to see if we could each make a set. Why not try and make something we would actually use?
How did you learn the required skills? The skills for making skis are fairly similar to basic woodworking skills. If you know your way around basic power tools, you’re most of the way there. Lucky for me, Malcolm had experience in vacuum moulding and I learnt a lot from him for this step of the process. We followed the basic steps shown on skibuilders.com, but the actual skills are being gradually refined by trial and error. With each subsequent pair of skis we make, we try to improve on the processes that didn’t work well on the previous pair. Though it seems that each improvement brings a new challenging problem, I’d like to think that eventually we’ll have a product that looks and performs just like a commercially available ski.
What tools did you use? The typical tools are a planer, table saw, jig saw, router, drill, digital calipers, and lots of clamps. We also had to make a few tools, including the ski template, mould and core profiler. The specialized tools are the vacuum moulding equipment. We were lucky to have a 1970’s era vacuum pump that was slated for recycling end up in our hands. It’s a bit old but works like a charm.
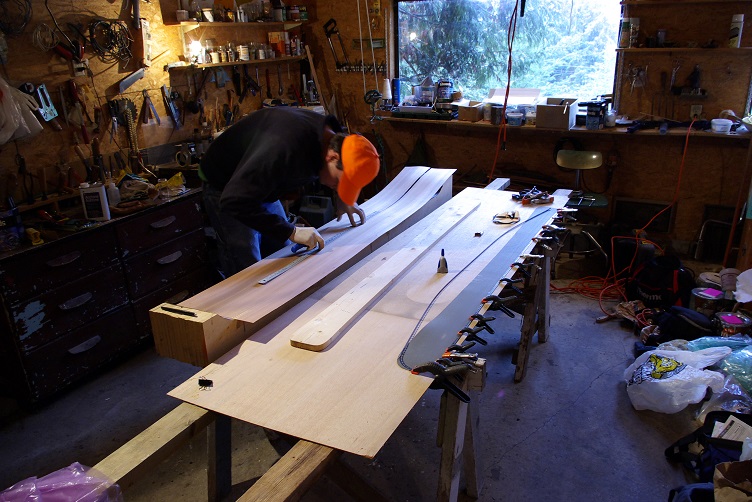
What was your favourite part of the process? TESTING! No doubt that putting on your pair of home-made skis and going for the first run is the most satisfying part of the process. I try to ski my homemade skis aggressively so that I can learn where their weak points are (essentially, I try to break them). My second favourite part of the process is lay-up. This is when all the components of the skis are ready and it’s time to put them all together (steel edges, base, fibreglass, core, top sheet) in a big epoxy sandwich. It’s the most critical part in the process when you can’t make a mistake. Once the epoxy is mixed, it’s only a matter of time before the epoxy cures so everything has to be ready to go.

Any advice for folks embarking on the same project? Start online with the amazing free resource skibuilders.com to get an idea of what is involved. My second piece of advice is to start simple. Try to duplicate a pair of skis that you already like to ski on, and compare how your skis perform to them. My third piece of advice is: be patient. At least triple the amount of time you think you’ll need to make your first pair. My last piece of advice is to keep your building components clean and dust free. When you come to the lay-up part of the process, each material must be clean and free of dust in order to get a good bond between all the layers.
Does this feature have you itching to hit the slopes? Get prepared for the skiing and snowboarding season with our Tune Your Skis and Snowboard Workshop on November 15th! Register in the shop or online.